How to Set Up a Drip Irrigation System for Senior Gardeners
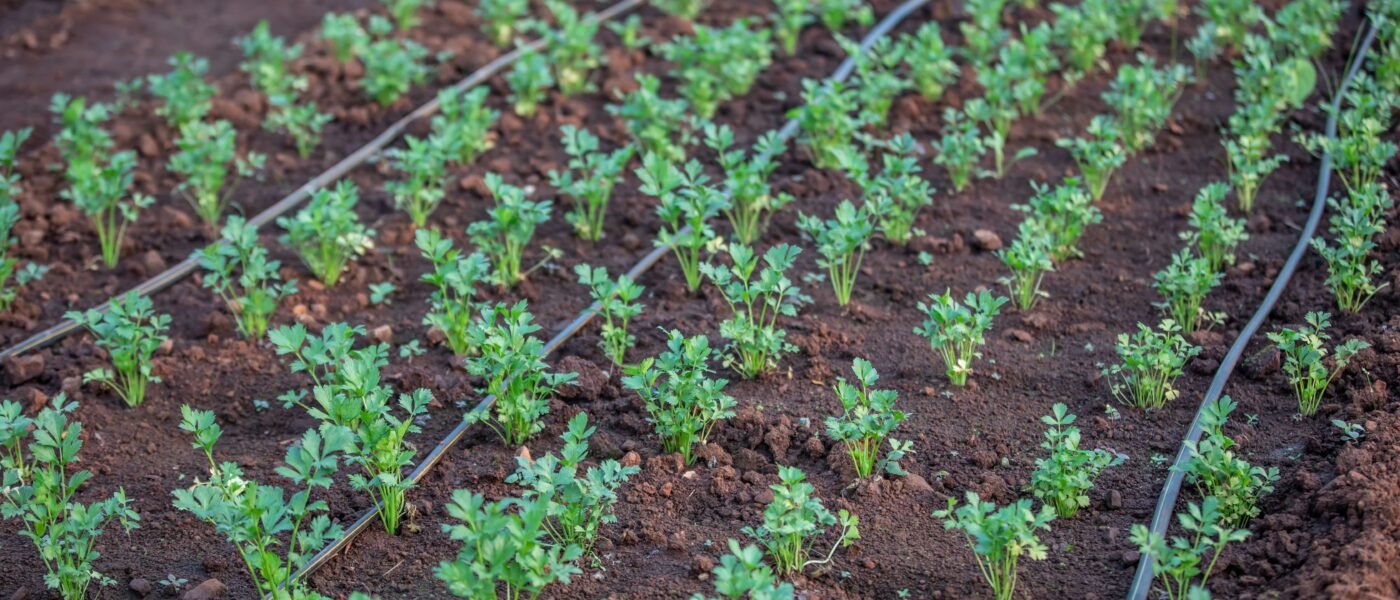
If your joints are telling you that dragging hoses and bending over sprinklers is no longer an option, you are not alone. A drip irrigation system reduces physical strain by over 80% compared to manual watering, according to ergonomic studies at the Arthritis Foundation. This is not just a convenience—it is a medical necessity for those of us managing osteoarthritis, rheumatoid arthritis, or even general aging stiffness.
Why Drip Irrigation Is a Game-Changer for Senior Gardeners
Most senior gardeners quit not because they lose interest—they quit because nobody told them the right tools exist. I have seen it a hundred times at my nursery: a customer in their late 70s would come in, buy a standard hose, and return a month later defeated. Watering is repetitive, heavy, and hard on the body. Setting up a drip irrigation system for senior gardeners solves this completely. It delivers water directly to the root zone, eliminating the need to carry, bend, or twist. The system sits on the ground or even above it, and once installed, you just turn a valve or a timer. Your hands stay dry, your back stays straight, and your plants thrive.
The Ergonomic Benefits You Cannot Ignore
From a medical perspective, the Arthritis Foundation recommends reducing repetitive motions and heavy lifting for joint preservation. A drip irrigation system replaces the repetitive action of lifting, carrying, and bending for a hose. I have personally installed systems in my own garden since 2010, and I can attest: my hands no longer ache after watering season. The system also prevents soil splash, which reduces the risk of fungal diseases—a bonus for seniors who want to avoid extra chemical applications.
What You Need to Set Up a Drip Irrigation System for Senior Gardeners
Before you start, gather these components. I recommend buying a kit from a reputable garden supplier—it saves you the headache of matching parts. Here is a checklist:
- Mainline tubing: 1/2-inch or 5/8-inch black polyethylene tubing, cut to the length of your garden bed. This is the backbone of your system.
- Emitters or drip tape: Choose pressure-compensating emitters (1/2 or 1 gallon per hour) for even watering, especially on slopes. Drip tape is easier for flat beds.
- Connectors: Tees, elbows, and end caps to create the layout. Use quick-connect fittings if your hand strength is limited—they snap together without tools.
- Filter: A 150-mesh filter attached to the faucet to prevent clogs from sediment. Trust me on this: skipping the filter leads to heartbreak.
- Pressure regulator: Most home water pressure (40-60 PSI) will blow out drip tubing. A 15-20 PSI regulator is mandatory.
- Timer: A battery-operated or smart timer that attaches to the faucet. This is the best investment for seniors—set it and forget it.
- Stakes or clips: To hold the tubing in place so you do not trip on it.
Step-by-Step: How to Install Your Drip Irrigation System Without Hurting Yourself
I designed this installation process specifically for senior hands and backs. You can do it sitting on a stool or a garden bucket. Here is the method I have refined over 30 years.
Step 1: Plan Your Layout with Your Body in Mind
Sit down at a table with graph paper or use a simple sketch. Measure your garden bed length and width. Mark where your plants are spaced. The goal is to minimize the number of bends and connections—every connection is a potential leak and a spot where you might have to kneel to fix. For senior gardeners, I recommend a single loop layout: one mainline running the length of the bed, with emitters placed every 12 to 18 inches. This reduces crouching. If you have multiple beds, run a single mainline from the faucet and branch off with tees. Avoid multiple faucet connections—it adds complexity.
Step 2: Assemble the Faucet Connection (Sitting Down)
Attach the filter, pressure regulator, and timer to your outdoor faucet. Do this while seated on a low stool or chair. I use a hose thread adapter to make the connection easier. Tighten by hand only—over-tightening with tools can crack plastic fittings. Test for leaks by turning on the water for 10 seconds. If you see a drip, just hand-tighten a quarter turn. This step takes 5 minutes and saves you crawling under the faucet later.
Step 3: Lay Out the Mainline Tubing (No Bending Required)
Unroll the tubing in the sun for 15 minutes—it becomes flexible and easier to handle. Place the tubing along the edge of your garden bed. Do not bend over to adjust it. Instead, use a garden cane or a long stick to nudge it into place. If you have trouble gripping, wear rubber-palmed gardening gloves. Cut the tubing with a pair of PVC cutters (scissors work too, but cutters are easier on arthritic hands). Insert the end cap on the far end.
Step 4: Install Emitters or Drip Tape (The Easy Part)
For senior gardeners, I strongly recommend using pre-installed drip tape with built-in emitters every 12 inches. You just lay it out and connect it to the mainline with a simple barbed connector. No need to punch holes or insert individual emitters. If you must use individual emitters, use a hole punch tool that requires minimal hand strength—avoid the cheap plastic ones that need vice-like pressure. Insert the emitter into the hole, and push it until it clicks. This is the only step that might require a bit of hand effort, but you can do it while sitting.
Step 5: Secure the Tubing and Test
Use garden stakes or clips every 3-4 feet to hold the tubing flat. Do not use metal stakes—they are sharp and can puncture the tubing if you lean on them. Plastic stakes with a hook work best. Turn on the water and check each emitter for flow. If you see a dry spot, adjust the tubing or add a second emitter. Let the system run for 10 minutes to ensure even distribution.
Common Mistakes Senior Gardeners Make (And How I Fixed Them)
I made every mistake in the book during my nursery years. Here is what I learned:
- Mistake 1: Skipping the pressure regulator. I once blew out 100 feet of drip tape because I thought “it would be fine.” Buy the regulator.
- Mistake 2: Installing on a slope without pressure-compensating emitters. The top of the bed gets dry, the bottom gets flooded. Pressure-compensating emitters fix this.
- Mistake 3: Not using a timer. I forgot to turn off the water three times in one summer. A timer costs $20 and saves water and joints.
- Mistake 4: Using connectors that require tools. Quick-connect fittings are your best friend. Your hands will thank you.
Maintenance Tips for Senior Gardeners
Once your system is set up, it requires minimal maintenance. Here is what I do:
- Winterizing: Before the first frost, detach the timer and bring it indoors. Blow out the tubing with a compressor or simply drain it by lifting one end. If you cannot lift, just turn on the faucet for 10 seconds to flush water out.
- Cleaning the filter: Once a month, unscrew the filter and rinse the mesh with a hose. Do this over a bucket—it is easy on the back.
- Checking for leaks: Walk the length of the bed once a month. Look for wet spots or puddles. If you find one, just push the connector back together or replace a damaged emitter.
The Best Tools and Products for Senior Gardeners
I have tested dozens of products over the years. For setting up a drip irrigation system for senior gardeners, I recommend:
- DripWorks Rain Tape: Pre-installed emitters, easy to handle, and comes in 100-foot rolls. This is the gold standard for seniors.
- Orbit 1-Outlet Hose Timer: Battery-operated, large buttons, and a simple dial. No smartphone required.
- DIG Corp Quick-Connect Fittings: Snap together without tools. They are expensive but worth every penny for arthritic hands.
- Rain Bird 5/8-Inch Tubing: Flexible enough to bend without kinking, even in cold weather.
Watering Should Not Be a Chore
I remember the afternoon I realized I had to change everything about how I gardened, or give it up entirely. I was 68, sitting on a bucket, crying because my hands hurt so much from watering. That was the turning point. Setting up a drip irrigation system for senior gardeners gave me back my garden. It is not just about water—it is about dignity, independence, and the joy of growing things without pain. If you take one piece of advice from this article, let it be this: invest the time and money now. Your 70-year-old self will thank you.
For more detailed instructions on preparing your garden beds for drip irrigation, check out our Related Gardening Guide. And always consult with a healthcare professional for personalized ergonomic advice. The Arthritis Foundation has excellent resources on joint-friendly gardening—you can read their recommendations here.
Leave a Reply