How To Garden In A Wheelchair: Accessible Gardening
After 15 years running a nursery, I disagree. Gardening is not just a hobby—it’s a proven way to maintain physical and mental health as we age. The Mayo Clinic highlights that gentle physical activity, like gardening, can reduce arthritis pain, improve flexibility, and boost mood. When you’re in a wheelchair, the benefits multiply: you’re engaging your upper body, getting fresh air, and staying connected to nature. But the key is making it work without injury. I’ve seen too many seniors quit because they tried to do it the old way—bending, twisting, reaching.
Gardening in a wheelchair requires a shift in mindset. You’re not doing less; you’re doing smarter. With the right setup, you can grow vegetables, flowers, and herbs that thrive. Trust me, I’ve grown everything from tomatoes to tulips from a seated position, and it’s deeply satisfying.
Step 1: Raise Your Beds to Wheelchair Height
The first and most critical change I made was raising my garden beds. A standard ground-level bed is impossible to work from a wheelchair. You’ll end up straining your shoulders and back, which is exactly what you don’t need with arthritis. I built my first raised bed at 30 inches tall—just below my elbow height when seated. This allows me to reach the center of the bed without leaning too far forward.
- Optimal height: 24 to 30 inches for most wheelchairs. Measure from your lap to the ground and add 4-6 inches.
- Width: Keep beds no wider than 4 feet so you can reach the middle from either side.
- Material: Use untreated cedar or composite lumber—they last years without rotting.
- Accessibility: Leave at least 3 feet of hard, level path around each bed for turning.
I remember the first time I used my raised bed—I could actually see my plants without craning my neck. It was a revelation. If you’re not handy with tools, many garden centers sell pre-built wheelchair-accessible beds. A Related Gardening Guide I wrote covers how to choose the right size for your space.
Step 2: Use Long-Handled, Ergonomic Tools
Your standard garden trowel and pruners are designed for standing or kneeling. From a wheelchair, you need tools that extend your reach and reduce joint strain. After my arthritis diagnosis, I switched to long-handled tools with padded grips. This simple change saved my hands from the worst of the pain.
Here’s what I recommend for gardening in a wheelchair:
- Ergonomic trowel: Look for a curved handle that fits your palm, with a 24-inch handle.
- Long-handled pruners: These let you cut branches without bending forward.
- Garden scoop: A lightweight, long-handled scoop for planting bulbs or moving soil.
- Tool caddy: Attach a bucket or apron to your wheelchair so tools are always within reach.
One of my favorite tools is a set of ratchet pruners. They multiply your strength, so even arthritic hands can make clean cuts. I’ve used the same pair for ten years now. The key is to test each tool while seated—if you have to stretch awkwardly, it’s not the right one.
Step 3: Create a No-Stoop Planting Routine
Planting seeds or transplants from a wheelchair requires a different technique. I learned this the hard way after dropping a tray of petunias and watching them scatter across the patio. Now, I use a simple system that works every time.
- Pre-mix soil: Fill a large bucket with soil and compost before you go to the bed. Place it on a small table next to your wheelchair.
- Use a planting board: Lay a wooden board across the top of your raised bed to create a flat work surface.
- Long-handled dibber: This tool lets you make planting holes without bending. I use a 30-inch dibber with a comfortable grip.
- Seed tape: Pre-made seed tapes or DIY tapes on toilet paper rolls make planting seeds accurate and mess-free.
I’ll never forget the spring I planted 200 tulip bulbs using this method. It took twice as long as it used to, but every single one came up. The key is patience and preparation. Gardening in a wheelchair isn’t about speed—it’s about enjoyment.
Step 4: Choose the Right Plants for Wheelchair Gardening
Not all plants are easy to handle from a seated position. I’ve found that certain varieties are naturally more accessible. For example, trailing plants like nasturtiums or creeping thyme can be planted at the edges of raised beds, where you can easily reach them. Tall plants like sunflowers or tomatoes need staking, which can be tricky from a wheelchair.
Here are my top plant picks for wheelchair-accessible gardens:
- Vegetables: Bush beans, salad greens, radishes, and cherry tomatoes (caged).
- Herbs: Basil, chives, mint, and lavender—all compact and easy to harvest.
- Flowers: Marigolds, zinnias, pansies, and dwarf sunflowers.
- Perennials: Hostas, ferns, and daylilies for low-maintenance color.
Avoid plants that require constant bending or heavy lifting, like large squash or sprawling vines. And never plant something that needs staking from a low angle—it’s a recipe for frustration. I learned that lesson with a rogue cucumber vine that wrapped around my wheelchair wheel.
Step 5: Watering Systems That Save Your Back
Watering is one of the biggest challenges for gardening in a wheelchair. Dragging a hose is nearly impossible, and carrying a watering can is heavy on arthritic hands. I switched to a drip irrigation system ten years ago, and it was the best decision I ever made. It runs on a timer, so I don’t have to lift a finger—literally.
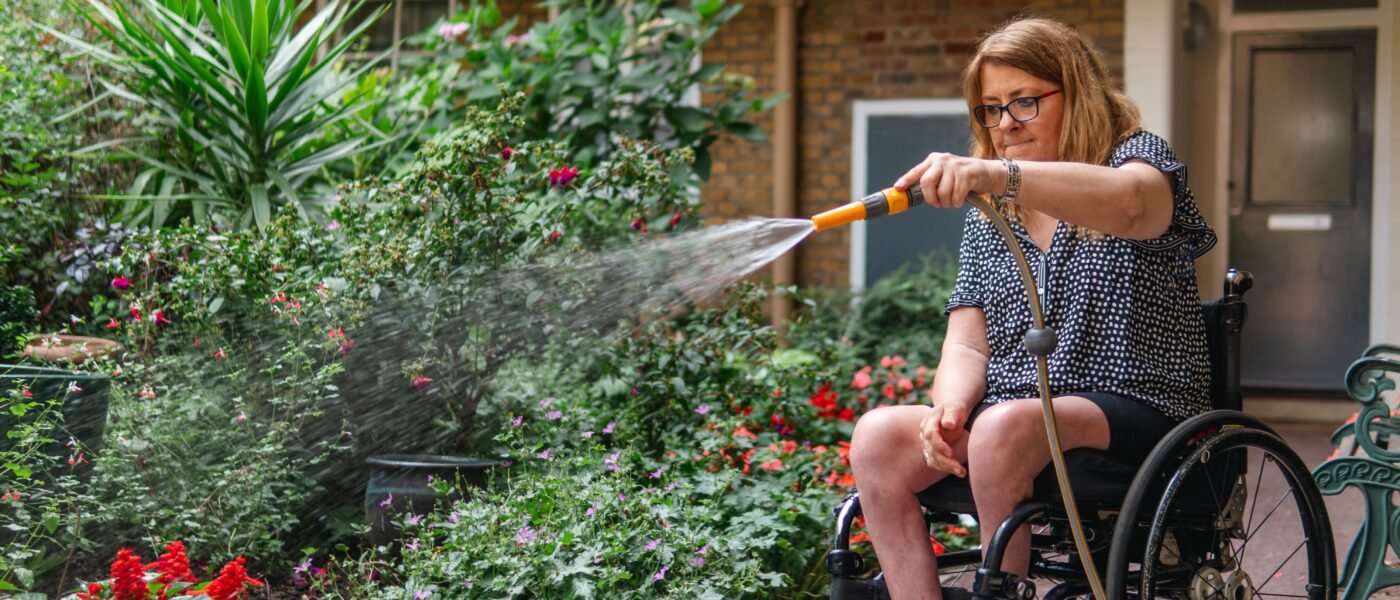
For those who prefer manual watering, use a lightweight, 1-gallon watering can with a long spout. Attach a hose nozzle with a trigger handle to your wheelchair armrest. I also keep a small rain barrel on a platform beside my bed, so I can fill the can without bending. The Arthritis Foundation recommends avoiding heavy lifting, so let technology do the work for you.
Step 6: Modify Your Wheelchair for the Garden
Your wheelchair itself can be optimized for gardening. I’ve added a few simple modifications over the years that made a world of difference:
- Wide tires: If you use a manual chair, swap to wider tires for better traction on grass or gravel.
- Armrest tray: A clip-on tray holds your tools, phone, or a cup of tea.
- Seat cushion: A gel cushion reduces pressure during long gardening sessions.
- Mudguards: Simple plastic guards keep dirt off your wheels and clothes.
I also recommend using a lightweight, foldable wheelchair if you’re transitioning between indoor and outdoor spaces. Mine has a mesh back that keeps me cool in summer. Don’t be afraid to ask a occupational therapist for advice—they’re experts in ergonomic adaptations.
Step 7: Pace Yourself and Listen to Your Body
The hardest lesson I learned about gardening in a wheelchair was pacing. In my 40s and 50s, I could garden for hours without a break. Now, I set a timer for 20 minutes of work, followed by 10 minutes of rest. I stretch my hands, shoulders, and neck during breaks. This routine prevents flare-ups of arthritis and keeps me safe from overuse injuries.
I also keep a gardening journal to track what works. For example, I discovered that morning is best for me—my arthritis is less stiff, and the sun isn’t too hot. Your body will tell you its rhythm. Listen to it. Gardening is supposed to be a joy, not a punishment.
Conclusion: The Garden Waits for You
I made a painful mistake the first spring my arthritis got bad—I tried to do everything the same way I always had. I ended up in agony, unable to sleep. But I learned that adapting isn’t losing; it’s winning. Gardening in a wheelchair is not only possible—it’s deeply rewarding. I’ve grown more tomatoes, herbs, and flowers from a seated position than I ever did standing. The key is accepting that your garden looks different now, but it’s still yours.
If you’re a senior gardener with arthritis or a wheelchair user, don’t give up. Start with one raised bed, one long-handled tool, and one plant you love. The garden will welcome you back with open arms—or in this case, open soil. And if you need more guidance, my Related Gardening Guide covers winter gardening from a wheelchair, which is perfect for November planning.
Remember: the best time to start is now. Your garden is waiting.
Leave a Reply