How to Grow Vegetables in Raised Beds as a Senior Gardener
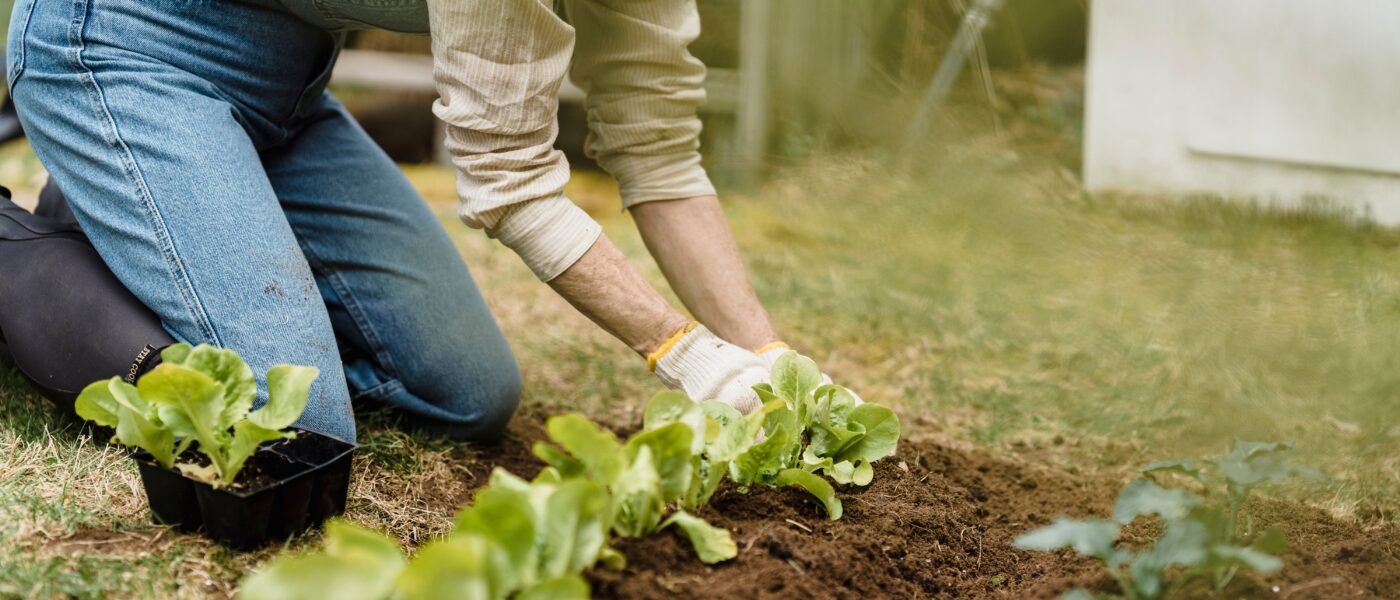
If your knees are telling you that kneeling in the garden is no longer an option, you are not alone. I remember the morning I tried to plant a single row of bush beans in my traditional in-ground plot. By the time I had the trowel in hand, my hip was already screaming, my back was locked in a knot, and my knees felt like they were filled with gravel. That was the day I realized I had to change everything about how I gardened, and now managing my own arthritis for the past two decades, I learned that how to grow vegetables in raised beds isn’t just a trend—it’s a practical, sustainable strategy for senior gardeners who refuse to quit.
Over the years, I’ve watched too many fellow seniors abandon gardening because they thought their bodies were failing them. They weren’t. Their gardening methods were. The physical demands of bending, kneeling, and weeding in flat soil can accelerate joint deterioration and muscle fatigue. But raised beds change the entire equation. They bring the soil up to you, reduce strain, and create a controlled environment that actually rewards a slower, more deliberate pace. In this article, I’ll share exactly how to grow vegetables in raised beds as a senior gardener, drawing from decades of personal trial and error, and the ergonomic lessons I learned through my own arthritis journey.
Why Raised Beds Are a Senior Gardener’s Best Friend
The single biggest mistake I see senior gardeners make is clinging to traditional in-ground plots out of habit or nostalgia. I did it myself for years. But the evidence is overwhelming: raised beds dramatically reduce the physical toll of gardening. When you grow vegetables in raised beds, you eliminate the need to bend over at a 90-degree angle. You can sit on the edge of the bed, use a stool, or even work from a wheelchair. Your hands stay closer to the soil, your spine stays straighter, and your joints thank you.
According to the Arthritis Foundation, gardening in raised beds can reduce joint stress by up to 60% compared to traditional ground-level gardening. That’s not a small number. That’s the difference between a productive season and a trip to the orthopedic surgeon. For me, it meant I could plant, weed, and harvest without needing a nap and an ice pack afterward.
But it’s not just about comfort. Raised beds offer better drainage, warmer soil in spring, and fewer weeds. You control the soil quality completely, which means you can amend it with compost, reduce heavy clay, or adjust pH without fighting the native ground. For a senior gardener with limited energy, that’s a massive win.
How to Choose the Right Height for Your Raised Bed
This is where most people get it wrong. I see seniors buying 6-inch-tall beds because they’re cheaper or easier to assemble. That’s a mistake. If you have arthritis or mobility issues, you need a bed that is at least 18 to 24 inches tall. Why? Because you should be able to sit on the edge and comfortably reach the center without leaning or stretching. A standard 12-inch bed forces you to bend at the waist. A 24-inch bed lets you sit on a stool, dangle your legs, and work with your arms in a neutral position.
Here’s what I recommend based on my own experience and physical limitations:
- 18 inches: Good if you can stand and lean slightly but want to avoid deep bending. Works best with a rolling garden stool.
- 24 inches: Ideal for sitting on the edge or using a chair. This is what I use for all my vegetable beds now.
- 30-36 inches: Perfect for wheelchair users or those with severe back issues. These are essentially elevated tables.
When you learn how to grow vegetables in raised beds at the right height, you’re not just protecting your body—you’re extending your gardening years by decades.
The Step-by-Step Guide to Building Your Raised Bed Garden
Let me walk you through the process I’ve refined over the years. This isn’t theory. This is what works for a senior gardener with arthritis, limited strength, and a desire to keep growing fresh vegetables without wrecking your body.
Step 1: Choose the Right Location
Place your raised beds where they get at least 6 to 8 hours of direct sun daily. But here’s the senior-friendly trick: put them close to your house. I have one bed right outside my kitchen door. That way, I can water, harvest, or check for pests without walking across the yard. Less walking means more energy for the actual gardening. Also, avoid spots where you have to carry heavy tools or water hoses uphill.
Step 2: Select the Best Materials
I’ve used cedar, redwood, composite lumber, and even galvanized steel. Cedar is my favorite because it’s naturally rot-resistant, lightweight, and easy to work with. Avoid pressure-treated wood made before 2004, as it may contain arsenic. Modern pressure-treated wood is safer, but I still prefer untreated cedar. For a senior gardener, stick with 2×6 or 2×8 boards—they’re heavy enough to be stable but manageable with a helper or a wheeled cart.
Step 3: Assemble Without Strain
Don’t try to build a raised bed alone if it’s large. I learned this the hard way when I dropped a 4×8 frame on my foot. Use corner brackets that screw together with a power drill, or buy pre-assembled kits. Many companies now sell raised bed kits that snap together in minutes. If you have arthritis in your hands, use a drill with a screwdriver bit instead of manual screwdrivers. Your grip will thank you.
Step 4: Fill the Bed Smartly
Here’s a secret that saves your back: don’t fill the entire bed with heavy soil. Use the “lasagna gardening” method. Start with a layer of cardboard or newspaper on the bottom to smother weeds. Add a layer of twigs or small branches for drainage. Then top with a mix of compost, peat moss, and vermiculite. This creates a light, nutrient-rich soil that’s easy to dig into with your hands. For senior gardeners, this is crucial because you don’t want to fight heavy clay or rocky soil.
Step 5: Plant Efficiently
When you grow vegetables in raised beds, you can plant more densely than in-ground because the soil is richer and drainage is better. I use a grid system: 1 square foot per plant for tomatoes, peppers, and eggplants; 4 per square for lettuce and spinach; 9 per square for carrots and beets. This maximizes yield without requiring you to spread out across a large area. Plus, dense planting shades the soil, reducing watering needs—another win for tired joints.
Best Vegetables for Senior Raised Bed Gardens
Not all vegetables are created equal when it comes to ease of care and harvest. Based on my 15 years of nursery experience and my own arthritis, here are the top performers for senior gardeners:
- Leafy Greens (lettuce, spinach, kale): They grow quickly, don’t require trellising, and you can harvest individual leaves without bending. Perfect for small raised beds.
- Bush Beans: No staking needed. They grow low and produce heavily. You can pick them while sitting on the edge of the bed.
- Cherry Tomatoes: Choose determinate varieties that stay compact. They grow well in cages and produce fruit at a convenient height.
- Peppers: Sturdy plants that don’t need support. They thrive in warm raised bed soil.
- Radishes and Carrots: Easy to sow and harvest. Carrots love the loose soil in raised beds, making them straight and tender.
If you’re wondering how to grow vegetables in raised beds with minimal effort, start with these. They reward you quickly and don’t require complex pruning or staking.
Ergonomic Tools That Make a Difference
Even with the perfect raised bed, the wrong tools can undo all your progress. I’ve tested dozens of gardening tools over the years, and I’ve narrowed it down to the ones that actually help seniors with arthritis. For detailed recommendations, check out our Related Gardening Guide on ergonomic tools. But here are the essentials:
- Long-handled trowel: Lets you dig while standing or sitting without bending.
- Ergonomic pruners: Ratcheting or spring-loaded handles reduce grip force by 50%.
- Kneeler stool: Converts from a kneeling pad to a seat. I use mine every single day.
- Water wand: Attaches to a hose and extends your reach. No more stretching or carrying heavy watering cans.
Remember, the goal is to work smarter, not harder. When you learn how to grow vegetables in raised beds with the right tools, gardening stops being a chore and becomes the joyful activity it was meant to be.
Common Mistakes Senior Gardeners Make (And How to Avoid Them)
I’ve made every mistake in the book, so you don’t have to. Here are the top three:
Mistake 1: Overwatering. Raised beds drain faster than in-ground soil, but they also dry out faster. Stick your finger an inch into the soil before watering. If it’s damp, wait. Overwatering leads to root rot and fungal diseases.
Mistake 2: Planting too early. I know the excitement of spring. But cold soil slows growth and can kill tender seedlings. Wait until the soil temperature reaches at least 60°F for warm-season crops like tomatoes and peppers. Use a soil thermometer—it’s a small tool that saves big heartaches.
Mistake 3: Ignoring soil health. After a season, raised bed soil loses nutrients. Each spring, top off your beds with 2-3 inches of compost. This is the most important maintenance task. Skip it, and your vegetables will struggle.
Gardening Is a Lifelong Gift
I still remember the first spring after I switched to raised beds. I sat on my stool, tucked my feet under the bed, and planted tomato starts without a single twinge in my back. That evening, I picked a handful of cherry tomatoes and ate them warm from the sun. My arthritis was still there, but it didn’t control my garden anymore. That’s the power of knowing how to grow vegetables in raised beds the right way.
Gardening isn’t about how much you can do—it’s about what you love doing. Raised beds let you keep doing it, season after season, without sacrificing your health or your joy. Start small, build smart, and let your garden grow with you.
Leave a Reply