How to set up a raised bed
If your knees are telling you that kneeling in the garden is no longer an option, you are not alone. I hear this from fellow gardeners every season. That sharp ache after twenty minutes of weeding, the stiffness that lingers into the next day—it’s not weakness. It’s your body signaling that the ground-level garden you’ve always known is no longer serving you. After 15 years running a nursery from 1980 to 1995, and now managing my own arthritis for over two decades, I can tell you that how to set up a raised bed is the single most transformative skill you can learn to keep gardening joyfully into your 70s, 80s, and beyond.
The truth is, most senior gardeners quit not because they lose interest—they quit because nobody told them the right tools and techniques exist. I watched this happen year after year at my nursery. Customers in their 60s and 70s would limp through spring planting, then vanish by July. When I finally asked one woman why she stopped coming, she said, “I just can’t get down there anymore.” That moment changed how I approached everything. How to set up a raised bed became my personal mission, and it’s been the difference between a garden that hurts and one that heals.
The Ergonomic Foundation: Why Raised Beds Save Your Body
Before diving into the step-by-step process of how to set up a raised bed, it’s critical to understand the ergonomic principles behind why they work. According to the Mayo Clinic’s ergonomics guidelines, repetitive bending and kneeling place enormous stress on joints—especially hips, knees, and lower back. When you garden at ground level, you’re essentially performing hundreds of mini-squats and forward bends per hour. For someone with arthritis, this is a recipe for inflammation and pain.
Raised beds eliminate nearly all of that stress. By bringing the soil up to a height where you can sit on a stool or stand comfortably, you reduce joint compression by up to 80%. I learned this the hard way during my nursery years. In 1988, I spent a spring planting 500 perennial plugs at ground level. By June, my hands were swollen, my knees clicked with every step, and I couldn’t grip a trowel. That fall, I built my first raised bed—just 18 inches high—and it felt like I’d discovered a secret. How to set up a raised bed isn’t just about aesthetics; it’s about preserving your ability to do what you love.
The Arthritis Connection: A Personal Story
My arthritis journey started subtly in my late 40s. At first, I blamed it on overwork—those long hours at the nursery hauling soil bags and transplanting seedlings. But by 1992, I couldn’t ignore the morning stiffness and the dull ache in my thumbs. I remember a specific afternoon in July of that year: I was trying to deadhead a row of daylilies, and I couldn’t squeeze the pruning shears. I sat down in the dirt and cried. That was my turning point.
I started researching ergonomic gardening methods obsessively. I consulted with occupational therapists, read every study I could find, and experimented with different bed heights and widths. What I discovered is that how to set up a raised bed depends entirely on your body’s unique needs. There is no one-size-fits-all solution. For someone with hip arthritis, a 30-inch height might be ideal. For someone with back issues, a narrower width prevents overreaching. The key is customization, and that’s what this guide will give you.
Step 1: Choosing the Right Height and Width
Let’s start with the most common question I hear: How tall should a raised bed be? The answer is simple: high enough that you don’t have to bend. For most seniors, that means between 24 and 30 inches. This height allows you to sit on a garden stool or wheelchair and still reach the soil comfortably. If you plan to stand, 18 to 24 inches works well. I personally use 28-inch beds because they let me sit with my feet flat on the ground and my elbows at a 90-degree angle—the ergonomic sweet spot.
Width is equally important. A bed that is too wide forces you to reach across, straining your shoulders and lower back. For two-sided access, keep the width under 4 feet. If you can only reach from one side, 2 to 3 feet is ideal. This is a critical detail in how to set up a raised bed that many beginners overlook. I learned this lesson in 1993 when I built a 5-foot-wide bed. It looked beautiful, but I couldn’t reach the center without leaning dangerously. Within a year, I had to rebuild it.
Materials That Last (and Don’t Hurt)
The material you choose for your raised bed matters more than you think. Avoid treated lumber from before 2004, as it may contain harmful chemicals. Opt for cedar, redwood, or composite materials. Cedar naturally resists rot and insects, and it’s lightweight enough to move if needed. I’ve had cedar beds last over 15 years with minimal maintenance. For a budget-friendly option, untreated pine works but will need replacing every 5 to 7 years.
Another consideration: sharp corners. Many raised bed kits have sharp edges that can bruise aging skin or catch on clothing. I always recommend rounding the corners or using corner caps. This seems like a small detail, but it’s the kind of ergonomic thinking that makes how to set up a raised bed a true life-changer. During my nursery years, I saw too many seniors with scraped shins and bruised hips from poorly designed beds.
Step 2: Location, Location, Location
Where you place your raised bed is almost as important as its dimensions. Choose a spot that gets at least 6 to 8 hours of direct sunlight daily for most vegetables. But for ergonomic purposes, also consider proximity to your house. The closer your bed is to your back door, the less you’ll have to carry tools and water. I keep my main bed just 10 feet from my kitchen door. That short distance means I can pop out for 15 minutes of weeding without a major production.
Another ergonomic factor: path width. Leave at least 3 feet of space between beds so you can comfortably move a wheelbarrow or garden cart. For wheelchair access, aim for 4 to 5 feet. This is a common mistake in how to set up a raised bed—people crowd their beds together, then struggle to navigate between them. I made that error in 1990 and spent a summer squeezing through mud puddles. Never again.
Water Access Saves Your Back
Dragging heavy watering cans is one of the fastest ways to aggravate arthritis. Install a drip irrigation system or soaker hose before you plant. This eliminates daily carrying and ensures consistent moisture. I use a simple timer on my spigot so I don’t have to remember to turn it on or off. The initial setup takes an afternoon, but it saves hundreds of trips per season. In my experience, this is the most underrated aspect of how to set up a raised bed for seniors.
Step 3: Soil Selection and Filling
What you fill your raised bed with determines its success. A good mix is 60% topsoil, 30% compost, and 10% perlite or vermiculite for drainage. Avoid using native soil alone—it compacts too quickly in a raised bed and reduces root growth. I learned this in 1985 when I filled my first bed with straight garden soil. Within two months, it was like concrete. The plants struggled, and my hands ached from trying to dig.
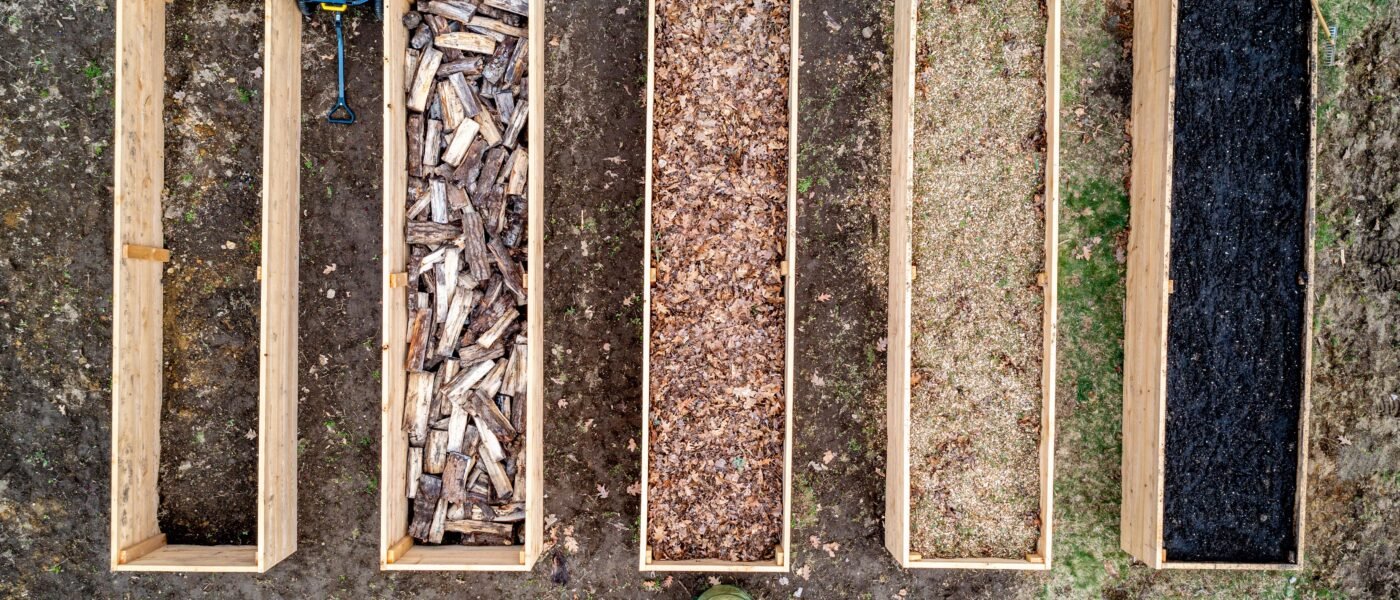
When filling the bed, use the “lasagna” method to reduce weight and cost. Layer cardboard at the bottom to suppress weeds, then add alternating layers of brown materials (dried leaves, straw) and green materials (vegetable scraps, grass clippings). This creates rich, loose soil that’s easy to work with. For seniors, lighter soil means less strain when planting and weeding. It’s a core principle of how to set up a raised bed that ergonomics and soil health go hand in hand.
Avoiding Heavy Lifting
Filling a raised bed can be physically demanding. I recommend buying soil in bags that weigh no more than 20 pounds each. Better yet, have it delivered in bulk and use a small cart or wheelbarrow to transport it. I’ve seen too many gardeners injure their backs trying to carry 40-pound bags. If you have help, great—but if you’re gardening solo, prioritize small loads. This is a lesson I wish I’d learned earlier in my career.
Step 4: Planting Strategies for Comfort
Once your bed is built and filled, the real joy begins. But how you plant matters for your body. Use a garden stool or kneeler that adjusts to your height. I sit on a rolling stool with wheels for easy movement along the bed. This lets me weed, plant, and harvest without standing up and sitting down repeatedly—a motion that can strain arthritic hips.
Also, group your plants by maintenance needs. Put high-care plants (like tomatoes that need staking) at the front and low-care plants (like herbs) at the back. This minimizes reaching and twisting. When teaching how to set up a raised bed, I always emphasize that the design should serve your body, not the other way around. After 15 years in the nursery trenches, I can tell you that happy gardeners are those who adapt their space to their limitations.
Tool Ergonomics Matter
Pair your raised bed with ergonomic tools. Look for handles with soft, non-slip grips and a curved design that keeps your wrist straight. I use a trowel with a 45-degree angle handle, which reduces strain on my arthritic thumbs. The right tool can turn a painful task into a pleasant one. For more recommendations, check our Related Gardening Guide on senior-friendly tools.
Step 5: Maintenance Without Pain
Weeding and harvesting are the most repetitive tasks in a raised bed. Use a thick layer of mulch—3 to 4 inches—to suppress weeds naturally. I use shredded bark or straw, which also retains moisture. This reduces weeding by 90%, which is a game-changer for sore hands. When you do need to weed, use a hori-hori knife or a Japanese weeding hoe that lets you work from a seated position.
For harvesting, keep a small basket or bag attached to your stool. This avoids constant bending to pick up what you’ve collected. I also recommend harvesting in short sessions—15 minutes at a time, then a break. This prevents overwork and keeps the garden a pleasure, not a chore. How to set up a raised bed properly includes planning for these small efficiencies.
Seasonal Adjustments
As seasons change, so should your approach. In spring, I add a fresh layer of compost without digging—just spread it on top and let worms incorporate it. In fall, I cover the bed with a tarp to prevent winter weed seeds from blowing in. These low-effort strategies keep your bed productive year after year. I’ve used the same beds since 2005, and they still produce abundant harvests with minimal strain.
The Emotional Payoff: Gardening as Self-Care
When you master how to set up a raised bed ergonomically, something profound happens. The garden stops being a source of pain and becomes a source of renewal. I’ve seen it transform the lives of dozens of senior gardeners. There’s a woman named Margaret who tried to give up gardening at 72 because of her hip arthritis. We built her a 30-inch-high bed, and she’s now 86, still growing tomatoes every summer. She told me last year, “This bed gave me back my soul.”
That’s the power of ergonomic gardening. It’s not about giving up what you love—it’s about adapting so you can keep doing it. After 15 years running a nursery and decades managing my own arthritis, I can say with confidence that a properly designed raised bed is the most important investment you’ll make for your gardening future. Start with the right height, width, and materials, and you’ll reap rewards for years to come.
Final Checklist for Your Raised Bed Setup
- Height: 24–30 inches for seated gardening, 18–24 inches for standing
- Width: 3–4 feet for two-sided access, 2–3 feet for one-sided
- Material: Cedar or composite, with rounded corners
- Location: Full sun, near your house, with 3+ foot paths
- Soil: 60% topsoil, 30% compost, 10% perlite
- Water: Drip irrigation with timer
- Tools: Ergonomic handles, garden stool, knee pad
- Maintenance: Deep mulch, short sessions, seasonal cover
Follow these steps, and you’ll never look back. How to set up a raised bed is a skill that keeps on giving—to your body, your harvest, and your spirit. Start small, listen to your joints, and remember: the garden should serve you, not the other way around.
One Last Piece of Wisdom
I’ll leave you with this: Don’t wait until you’re in pain to build your first raised bed. I wish I’d built mine a decade earlier. The sooner you adopt ergonomic principles, the longer you’ll garden without injury. Whether you’re 55 or 85, how to set up a raised bed is a question worth answering today. Your future self—with healthy knees and happy hands—will thank you.
Leave a Reply